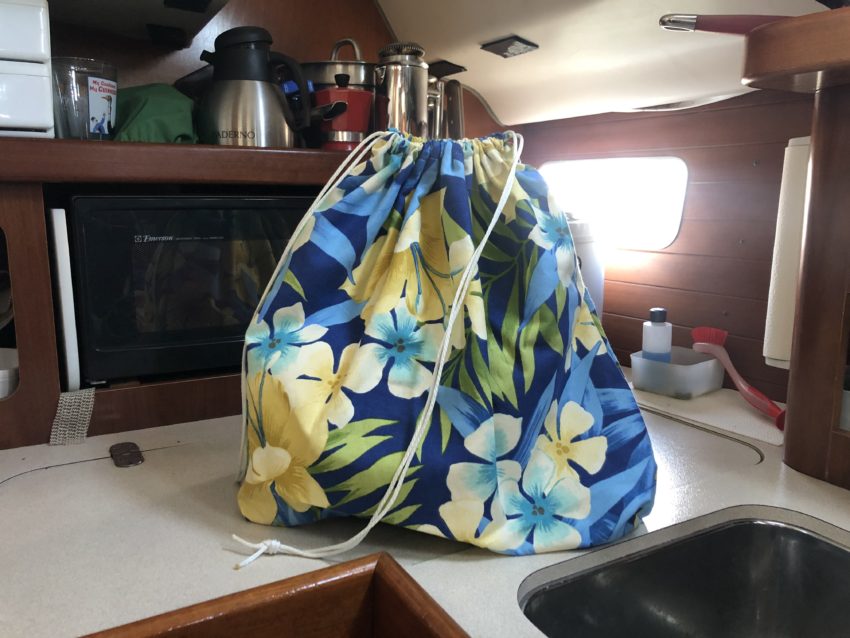
Sewing projects for the boat are my favorite. While it’s always nice to sew something custom at home, boat sewing gives me the satisfaction that I’ve solved a boat challenge I don’t get from house (or land sewing).
Boats are always unique, and it can be next to impossible to find what you need in a store. Small space living brings unique challenges, finding something you need, the right size and fabrication, and something you actually like.
The toaster has been a conversation ever since we started boating. I’m not sure if it’s my husbands Scottish heritage that drives the importance of having access to toast in the morning, but toast is a staple. When we moved in together I was introduced to the toast dryer stand. I thought he was just storing the napkin holder in the wrong cupboard, but no, it was the toast drying stand.
Toast is clearly a staple on our boat, so next comes the challenge of where the toaster goes. Right now we have an electric toaster on the boat. For years, the conversation is always where to store it so it’s accessible, and where it doesn’t make a mess. Toasters are notoriously messy with all the crumbs, and crumbs are not something I need spread out all over my boat!
For the past several years, we’ve had a place on the counter in the galley it has fit nicely. With some nonstick fabric on the counter to keep it in place, as well as some silicone ice cube trays to snug it up a little between the magnetic knife block and the hull of the boat.
I added the silicone ice cube trays a couple years ago, as up until then we’d never had a problem sailing. The stars seemed to align one day, and it was the perfect wave/wind situation where the toaster knocked the chefs knife off the magnetic strip. Flying chef knife on a galley counter anyone? Things you do not need while underway!
This year we decided it was time to move our ice maker onto the counter, forcing a relocation of the toaster. After some fun debate as to where the precious toaster was going to be stored, the decision was to reorganize the large cupboard and make room for it in there.
Now that we had a new home identified, crumb control was the next challenge. As much fun as it would be to wipe out a cupboard all the time, and the general spread of crumbs everywhere on the boat, I wanted to contain the mess!
A toaster in a bag solution and we’re done. I don’t know why I hadn’t thought about that sooner, oh the conversations I could have spared myself from! Taking a quick browse on the internet, I of course find nothing for sewing a toaster appliance storage bag. I found countless patterns for sewing an appliance cover for a counter, but nothing for crumb control on the bottom.
Why over think this, I’ll just sew a simple drawstring bag! The same drawstring bag as my wine bags would work just great. I picked up some fun tropical canvas fabric the other year which I hadn’t done anything with yet, so a toaster bag will be it’s first use.
My husbands request was to sew the bag big enough that it would allow space, if our next toaster is a bit bigger. While I may not be sold on the idea of a bigger toaster, sewing an oversized bag is way easier than sewing a perfectly fitting bag. I’m not trained at pattern reading, or pattern making, so erring on the side of caution and sewing a bigger bag I’m ok with.

I had some fun and pulled out my roll of paper, making an attempt to determine the dimensions for my toaster bag. I decided to go with an extra size inches on the narrow side of the toaster, and 16 inches on the other sides. Again, opting for an oversized bag. My rationale was I’d rather sew a bag that was too big, than feel defeated and sew a bag that didn’t fit. I could easily take an oversized bag and use how it fit to take measurements for a more fitted bag.
I’ve always had a challenge committing to projects, thinking will it be perfect, and taking forever to do anything. So now, if my mindset is it’s going to be a little big, I mentally have allowed myself for it to be ok!

Sewing away I went. The act of sewing a drawstring bag is easy, it’s the determining the measurements of the fabric that take all the time. I do prefer a more finished look in the interior of the bag. Yes, it’s the inside of the bag and who cares, but not having a serger, I’d rather just avoid fraying fabric on the inside and keep it looking cleaner.
I made a 1/4 inch hem around the three side of the bag, and I made my pocket for the drawstring an inch. I was a little torn on whether or not to box the bottom of the bag, but I did, and I can’t complain. My toaster bag turned out great, a little oversized as planned, but it’s done! Toaster crumb control mission complete.


I’m happy with how the bag turned out. It fits great in its new home in my galley cupboard. Right now I’m going to start with it being stored behind my stainless bowls, but we’ll see how it goes and they may switch places. It’s easy to access for those mornings before coffee, it’s off my counter, and it’s controlling crumbs! Obviously I wouldn’t want to put a hot toaster in the bag, but the time it’s on the counter cooling down I can manage just fine.

Happy boat sewing and eating toast on your boat!
